How to Sync Google Workspace Users to AWS Identity Center using ssosync
Devops | 3x AWS Certified | CKA
Introduction
If you are moving to AWS Identity Center (formerly SSO) and want to keep your Google Workspace users and groups in sync, ssosync is the go-to tool. However, setting up the permissions can be tricky.
If you’ve seen the error unauthorized_client: Client is unauthorized to retrieve access tokens, you are likely missing a specific scope or delegation step.
Here is the easy way to set it up from scratch.
Step 1: Create your Google Cloud Credentials
Go to the Google Cloud Console.
Create a New Project (e.g., "AWS-SSO-Sync").
Enable the Admin SDK API: Search for it in the Library and click Enable.
Create a Service Account:
Go to IAM & Admin > Service Accounts.
Create an account, name it
ssosync-service-account.Once created, click on the account, go to the Keys tab, and Add Key > Create new key (JSON).
Save this file! You will need to base64 encode this for your
.envfile.# Replace file name `ssosync-486114-bb1ce7f2ebb9.json` with your file name. cat ssosync-486114-bb1ce7f2ebb9.json | base64 | tr -d "\n" | pbcopy # And result of this we need to store in GOOGLE_CREDENTIALS_JSON variable in .env file
Copy the Unique ID: Back on the Service Account details page, copy the Unique ID (a long string of numbers). You'll need this for the next step.
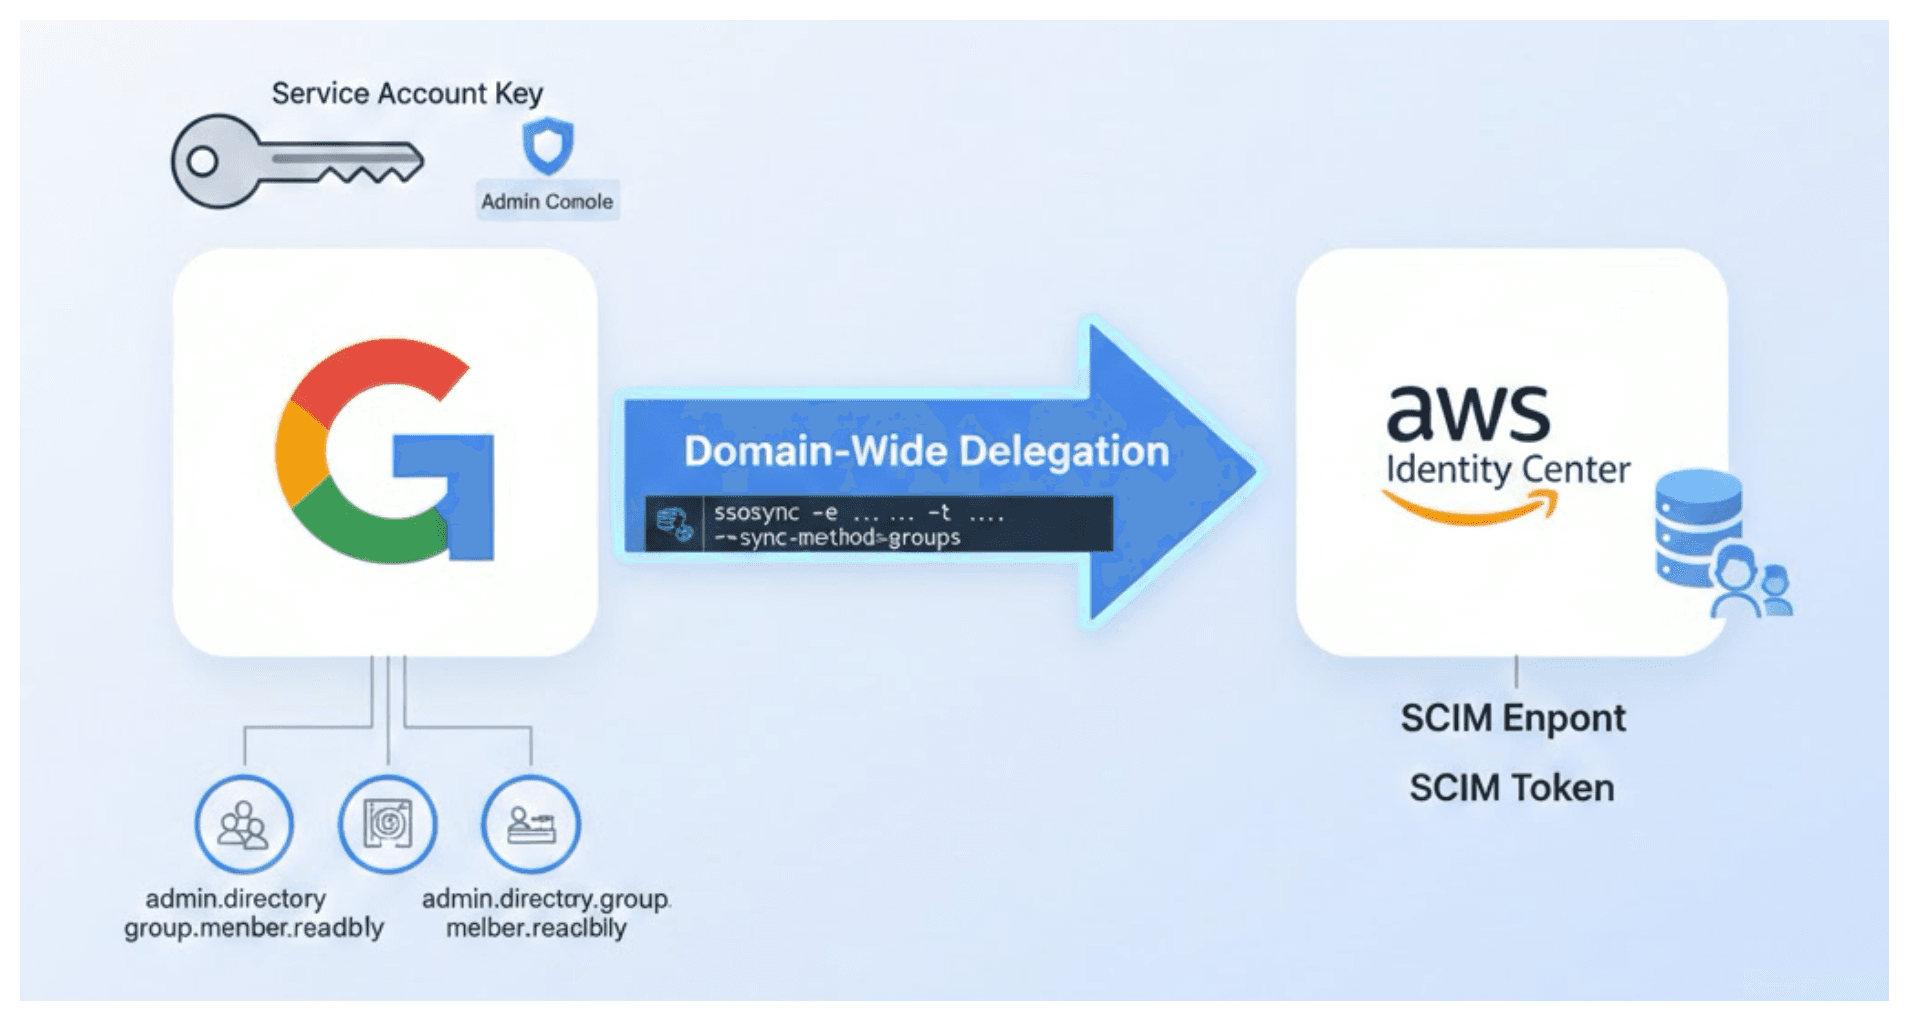
Step 2: Grant "Domain-Wide Delegation"
This is the part most people miss. You have to tell Google Workspace that this Service Account is allowed to "read" your organization's data.
Open the Google Admin Console.
Go to Security > Access and data control > API controls.
Click Manage Domain Wide Delegation.
Click Add new and enter:
Client ID: Paste the Unique ID you copied in Step 1.
OAuth Scopes: Copy and paste this exact list:
https://www.googleapis.com/auth/admin.directory.group.readonly, https://www.googleapis.com/auth/admin.directory.group.member.readonly, https://www.googleapis.com/auth/admin.directory.user.readonly
Click Authorize.
Step 3: Get your AWS SCIM Details
Open the AWS Identity Center console.
Go to Settings > Provisioning.
Enable Automatic Provisioning.
Copy the SCIM endpoint and the Access token. (Keep the token safe; it only shows once!)
Step 4: Configure your Environment
Create a .env file. To get your GOOGLE_CREDENTIALS_JSON, run cat your-key.json | base64 in your terminal and paste the result.
Bash
# .env example

# 1. Base64 encoded service account JSON key
GOOGLE_CREDENTIALS_JSON=your_base64_string_here

# 2. A real Admin email address from your Google Workspace
GOOGLE_USER=admin@yourdomain.com

# 3. AWS SCIM Details
SCIM_ENDPOINT=https://scim.us-east-1.amazonaws.com/xxx/scim/v2/
SCIM_TOKEN=your_secret_token

# 4. AWS Identity Store & Region
AWS_IDENTITY_STORE_ID=d-123456789
AWS_DEFAULT_REGION=us-east-1

# 5. AWS Access Keys (to talk to the AWS API)
AWS_ACCESS_KEY_ID=AKIA...
AWS_SECRET_ACCESS_KEY=...
Step 5: Run the Sync
Now you can run the sync command. Bash
ssosync \
  -e $SCIM_ENDPOINT \
  -t $SCIM_TOKEN \
  -u $GOOGLE_USER \
  -i $AWS_IDENTITY_STORE_ID \
  -r $AWS_DEFAULT_REGION \
  --debug
Note : You can refer official github repo ssosync to know about more sync commands
Groups in Google Workspace

Groups In AWS Identity Center

Admin Group Members in Google Workspace

Admin Group Members in AWS Identity Center

Dev Group Members in Google Workspace

Dev Group Members in AWS Identity Center

Why this works:
By adding the admin.directory.group.readonly and admin.directory.user.readonly scopes in the Google Admin panel, you are explicitly giving ssosync the permission to "look" at your users. Without this, Google rejects the connection (401 Unauthorized), even if your password/key is correct!